How to Restore Flood Damaged Electronics, Telecom Equipment, and Fiber Optic Connectors
Although water can cause extensive damage to electronics, it does not mean that equipment is lost and cannot be replaced. Electronics, telecommunications equipment, and fiber optic connections are able to be restored after water damage. The damage can be reversed using cleaning solutions that target water and trapped moisture. Once moisture is removed, assemblies can be cleaned to remove oil, grease, soot, debris, and other soils. This guide will walk you step by step on how to restore your electronics; however, if you need help or have any questions feel free to contact us or watch our Chemtronics Flood Recovery Tutorial Video on the bottom this article, if you're in a hurry.
Step 1: Rinse Electronic Equipment with Clean Water
- All the affected equipment should be flushed well with clean water to remove salt, sediment and particulate matter.
- Flush with water until the rinsate is clear. After the equipment has been rinsed thoroughly, allow to stand and completely drain. Equipment already damaged by water will not be damaged further by the use of clean water.
Step 2: Remove Water and Moisture
Water and moisture must be removed from all parts and assemblies. This can be effectively accomplished by using Flux-Off® Water Soluble. The hydrophilic nature of this solvent attracts moisture and dissolves and carries away water.
- Use the aerosol spray to dislodge and flush away trapped moisture in addition to excess surface contaminants. Equipment and components can also be dipped into the solvent.
- Coventry Econowipes (part number 6709 or 6704) can be used to aid with cleaning and drying.
- After using Flux-Off® Water Soluble, allow the equipment and assemblies to completely dry
- To speed up the drying process, use Typhoon Blast 70 Duster. The high pressure of the UltraJet® Duster performs as a “portable compressor” to effectively dry excess moisture and solvent.
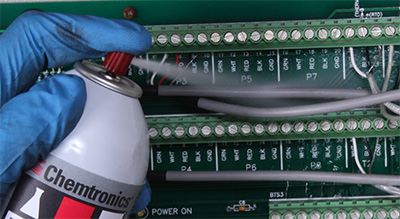
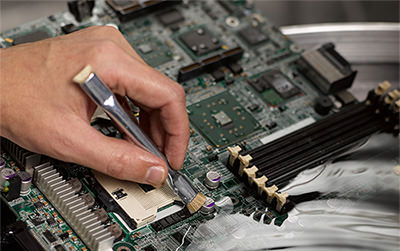
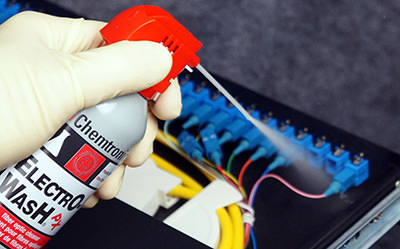
Step 3: Remove Remaining Contaminants
Additional cleaning may be necessary to remove other contaminants and excess moisture. Use Electro-Wash® PX (part number ES810) for plastic-safe cleaning.
- Spray equipment thoroughly and allow it to dry completely. Make sure all contaminated areas have been sprayed and completely cleaned.
- Use Coventry Econowipes to aid with cleaning and drying.
- To speed up the drying process, use Typhoon Blast 70 Duster to remove the remaining solvent from components.
- Use Chemtronics DPL Deep Penetrating Lubricant to clean and protect copper connections and switches. It is used to clean, displace moisture, inhibit corrosion, reduce friction and protect metal surfaces in one easy step.
Step 4: Clean Backplane Connections
Cleaning and restoration of fiber optic backplane connections can be effectively achieved through the use of Chemtronics’ Combination Cleaning Tools, or with cleaning swabs designed for this purpose.
Option 1
Choose the appropriate FOCCUS™ Combination Cleaning Tool (CCT) based on the type of fiber connection. CCT Tools are available for 1.25mm, 2.5mm and MPO connections. CCT tools have an easy to use a mechanism that advances fabric over a cleaning tip with just a short push and
- Remove the dust cap from the end of the CCT tool.
- Lightly wet the CCT fabric tip with a Fiber-Wash pen.
- Insert the CCT tip directly into the connector. Push in the tool 2-3 clicks, advancing the fabric from wet-to-dry. The fabric rotates while advancing, adding additional cleaning action.
- Repeat on the next connector until all connectors have been cleaned.
- The end faces of unconnected patch cords can be cleaned by placing the dust cap back onto the end of the CCT tool. The dust cap becomes an adapter that fits directly over the ferrule of the connector.
- Test the connector with a fiberscope and, if necessary, repeat cleaning procedure.
Option 2
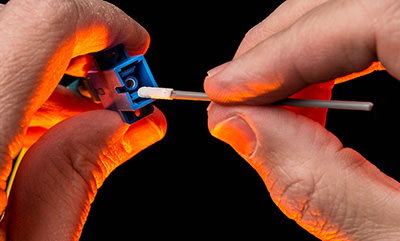
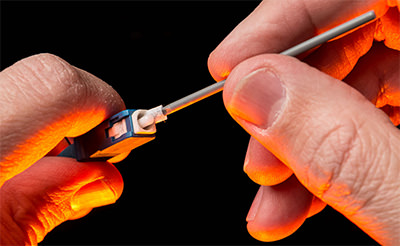
This method is preferred when contamination is substantial. Use the appropriate swab and a small amount of Electro-Wash® PX Fiber Optic cleaner or the Fiber-Wash Cleaner Pen that was mentioned above:
- Use the 48042F swab for cleaning 2.5 mm connections and the 26122F swab for 1.25 mm connections.
- Spray a small amount of the Electro-Wash® PX onto a clean QbE® wipe or another clean lint-free wiper (Coventry® 6704 Econowipe™). Dampen the swab by lightly touching the swab head to the moistened area. Do not over saturate the swab head.
- Optionally, saturate the felt tip of the Fiber-Wash MX pen by depressing it onto a clean wipe. Dampen the swab by touching it to the pen tip.
- Feed the moistened swab tip through the alignment sleeve to clean the backplane connection, Repeat the procedure a second time using a dry swab. The use of this process allows the first moistened swab to remove all types of contaminants while eliminating the static bond that holds contaminants to the end-face. The second dry swab removes any remaining solvent.
- Test connector with a fiberscope and, if necessary, repeat cleaning procedure.
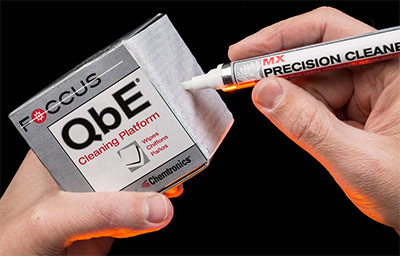
Step 5: Clean FO Connections With the Combination Cleaning™ procedure
Use the QbE® cleaning system in combination with Electo-Wash® PX Fiber Optic Cleaner to remove contaminants from connector end-face. The large surface area of the QbE® system allows both standard and APC connectors to be cleaned with the same tool. Use the following procedure to clean connector end-faces.
- Pull one QbE® wipe from the box over the neoprene platen.
- Spray a small spot (about quarter-size) of Electro-Wash® PX onto one corner of the wipe.
- Optionally saturate the corner of the wipe with Fiber-Wash MX pen
- Move the end-face of the connector from the wet area of the QbE® lightly across the dry portion of the pad. Make sure to hold the end-face at a 90º perpendicular to the platen.
- Repeat the wet to dry cleaning motion two more times, and make sure not to retrace your cleaning procedure of previously used areas of the wipe.
- Test connector with a fiberscope and, if necessary, repeat cleaning procedure.
Step 6: Clean the Barrel of the Ceramic Ferrule
- Clean the barrel of the ceramic ferrule using a Coventry™ 38542F swab moistened with Electro-Wash® PX Fiber Optic Cleaner.
- Spray a small amount of Electro-Wash® PX onto a clean QbE® wipe. Lightly moisten one side of the swab on the damp portion of the QbE®. Rotate the
wet side of the swab on the ceramic ferrule 2 to 3 times. - Reverse the swab and rotate the dry side of the swab on the ceramic ferrule 2 to 3 times.
With that information, you'll be able to restore your electronic equipment. As we mentioned before, we're here to help. So feel free to send us an email or if you need urgent support call us the toll-free number 1-800-TECH-401.
Chemtronics Flood Recovery Tutorial